
You're a few steps away.
Every step from installing the app to getting your tax report is here. Connect your exchange, wallet or file, set alerts, sync your devices and add the widget to your home screen.
Getting started
KronX runs on iPhone, iPad and Android phones and tablets. Three steps get you going.
Download the app
KronX will be available on the App Store and Google Play. The store pages are coming soon.
Try it free for 7 days
Your subscription starts through the store, and the first 7 days are free. After that it's $11.99/month or $99.99/year. Details are on the Pricing page.
Connect your first source
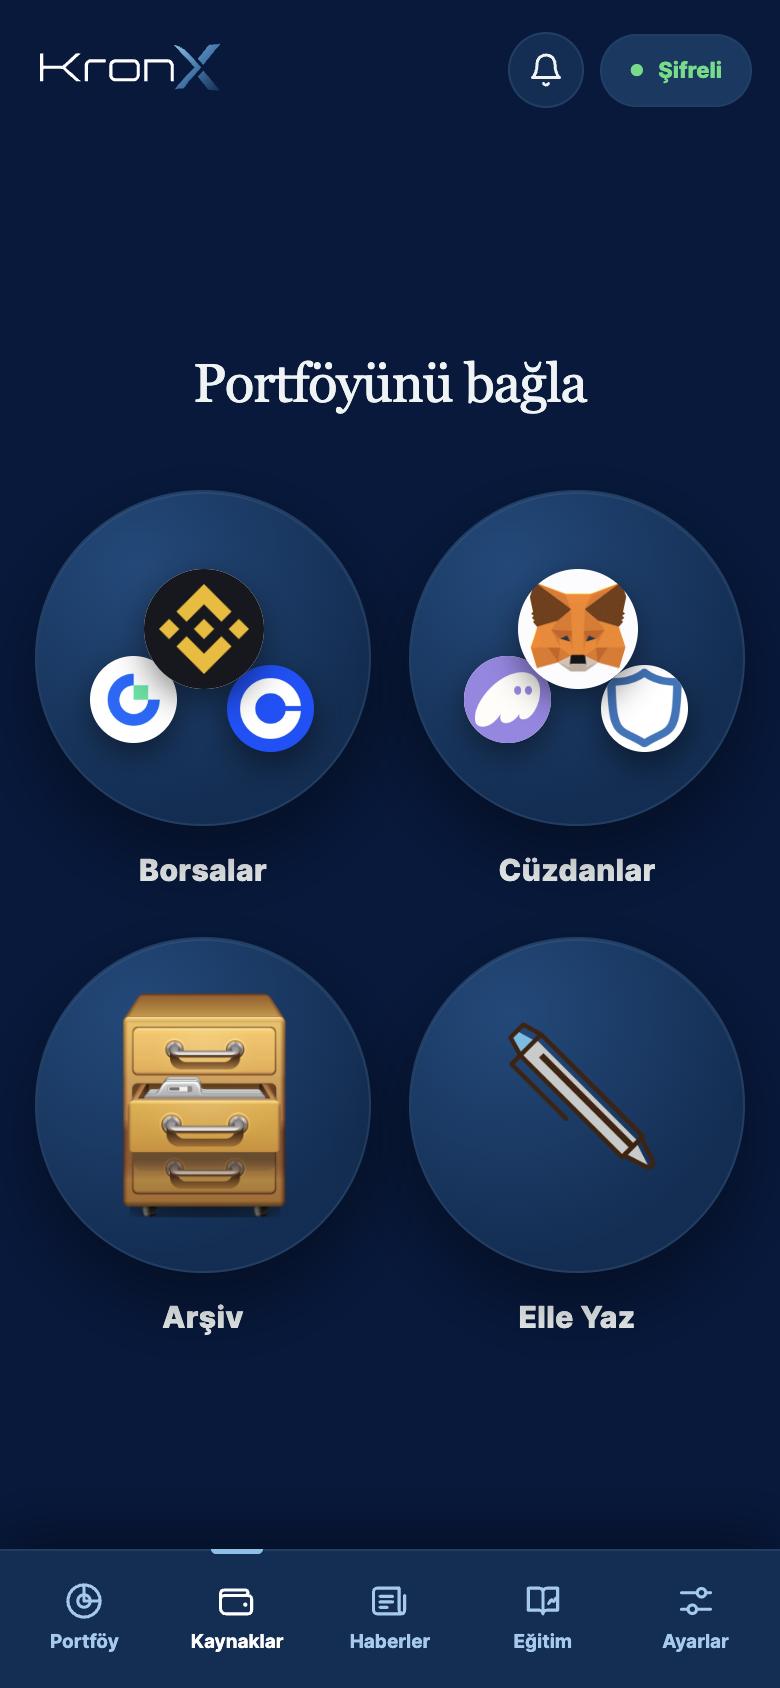
Open the Sources tab in the bottom bar. On the "Connect your portfolio" screen, start with "Exchanges", "Wallets", "Archive" or "Write manually".
The app creates a sync code for you the first time you open it. Keep this code somewhere safe; see Syncing your devices for details.
Connection types
Open the Sources tab in the app's bottom bar. The "Connect your portfolio" screen offers four options.
Exchanges · API key
A read-only key from your exchange lets KronX read balances and trades on a regular schedule.
Wallets · address
Enter only the public wallet address; the network is recognized from it.
Archive · file
Upload the CSV, XLS or XLSX history file you downloaded from your exchange.
Write manually · manual entry
Add a trade that has no connection yourself, and preview your new average cost before saving.
To see how each exchange and network connects, visit Exchanges and networks.
Connecting an exchange (all exchanges)
The flow is the same on every exchange, and the app shows these three steps on its own screen too:
Open the exchange's API section
Go to API management in your exchange account menu. Exchange-specific menu names are in the guides below.
Create a key with read permission only
Create a new key and tick only the read permission. Do not enable trading, transfer, withdrawal, margin or futures permissions.
Paste it into KronX
In KronX go to Sources → Exchanges → Add API key, pick your exchange and fill in "API key" and "Secret key". If the exchange needs them, "Passphrase" or "Username" fields appear as well.
Read frequency: Your trades are read every 2, 4 or 12 hours (4 by default). IP restriction is recommended: add every secure IP address KronX gives you (the app's "Trusted IP" field) to your key on the exchange, so it cannot be used from anywhere else.
Most exchanges show the secret only once. Never share it; KronX will never ask for it by email. If a key has withdrawal or trading permission, the app warns you.
BtcTurk
Use the website
BtcTurk API keys can only be created on the website. Sign in and open Account → API Access (Hesap → API Erişimi).
Create the key
Click API KEY OLUŞTUR. Under permissions, tick only Total Funds (Toplam Varlık) and Account (Hesap); do not grant Trade (Al-Sat).
Add it to KronX
Paste the public key and the secret into the matching fields in KronX.
Paribu
Turn on passkey
Paribu requires the passkey security level for API use. Keys can only be created on the paribu.com website.
Create the key
From the icon at the top right, open Security settings (Güvenlik ayarları) and follow Create API key (API anahtarı oluştur). Name the key, choose read permissions only, leave trading and withdrawal off, and confirm with your passkey.
Add it to KronX
Paste the API key and secret into KronX.
Paribu lets you set an expiry date on a key. If you do, you'll need to update the connection in KronX with a new key when it expires.
OKX TR
Open the API section
Sign in to OKX TR, tap the user icon and choose API from the menu.
Create the key
Choose the account, then click Create API Keys. Keep only read permission selected and set a passphrase.
Add it to KronX
Enter the API key, secret and passphrase in KronX.
You set the passphrase yourself and OKX TR cannot recover it; if you lose it, create a new key. OKX TR keys don't work on global OKX, so the two are connected separately.
Bitexen
Create the key
Sign in on the Bitexen website and create a new API key from the security section of your account settings. Grant read permission only. You'll set a passphrase while creating it.
Add it to KronX
Bitexen needs four things: API key, secret, passphrase and your Bitexen username. KronX shows a field for each.
Binance
Before you start
Your account needs two-factor authentication (2FA) and completed identity verification.
Open API Management
On the web: profile icon → Account → API Management → Create API. In the app: in Binance Pro, More → Other → API Management.
Create the key
Choose the system-generated key type, give it a name and confirm with 2FA. Leave only Enable Reading switched on.
Add it to KronX
Paste the API key and secret into KronX.
Binance limits system-generated keys without an IP restriction to read-only access. For extra security, we still recommend adding KronX's secure IP addresses to your key.
OKX
Open the API section
On the web: profile → API → Create API key. In the app: menu → scroll down → API → Create API key.
Create the key
Pick a name, account and purpose. Select only Read; leave Trade and Withdraw unticked. Set a passphrase and confirm with 2FA.
Add it to KronX
Enter the API key, secret and passphrase in KronX.
OKX cannot recover a lost passphrase; you would need to create a new key.
Bybit
Use the website
Bybit API keys can only be created on the website, not in the mobile app. Go to profile icon → API to open API Management.
Create the key
Click Create New Key. Select Read-Only permissions and confirm with your Google Authenticator code.
Add it to KronX
Paste the API key and secret into KronX.
Bybit only returns some records for the last 730 days. For older trades, download a file from the exchange and upload it to the Archive; the app also reminds you about this.
Gate
Open API Management
On the web, hover over the profile icon and choose API Management. Click Create API Key.
Create the key
Add a remark and choose API v4 Key as the type. Under permissions, select Read Only. Confirm with your fund password and 2FA.
Add it to KronX
Paste the API key and secret into KronX.
Gate keeps keys without an IP binding valid for 90 days. When it expires, create a new key and update it in KronX, or bind the key to the IP addresses the app shows.
Coinbase
Open the Developer Platform
Sign in to Coinbase Developer Platform with your Coinbase account, and on the Secret API Keys tab click Create API key.
Create the key
Name the key. Keep only View permission; don't grant Trade or Transfer. Choose Ed25519 as the signature algorithm.
Add it to KronX
Paste the key ID and secret into KronX.
KronX works with Ed25519 keys only. If you enter an older (ECDSA / ES256) key, the app asks you to create a new Ed25519 key.
Other exchanges
For exchanges without a guide here, the three general steps still apply: create a key with read permission only in the exchange's API management and paste it into KronX. All supported exchanges are listed on Exchanges and networks.
Adding a wallet address
Open Wallets
Go to Sources → Wallets → Add wallet address.
Paste the address
Paste your public address into "Wallet address". The network type is recognized automatically.
Choose EVM networks
One Ethereum-style address can read every EVM network. Ethereum, Arbitrum, Base, BNB Chain, Polygon, Optimism and Avalanche are selected by default; add or remove any. More networks mean a longer scan.
Save
Tap Add wallet. If you've added the address before, you can change its networks and save.
Only the public address is saved. No signature is requested, no private key is asked for, and no funds can be withdrawn. On non-EVM networks only the balance is read.
Importing from a file
Download your file
Export your trade history from the exchange. File formats from 15 exchanges are recognized.
Open the Archive
Go to Sources → Archive → Import from file and pick the exchange.
Choose the file
Tap Choose file; CSV, XLS and XLSX files are accepted.
Preview and confirm
Check the preview and add the trades. The same trade is never added twice; rows that overlap with API records are filtered out.
Adding a trade manually
You can enter a buy or sell that has no connection yourself. Before saving, you see how it affects your average cost.
Open the trade screen
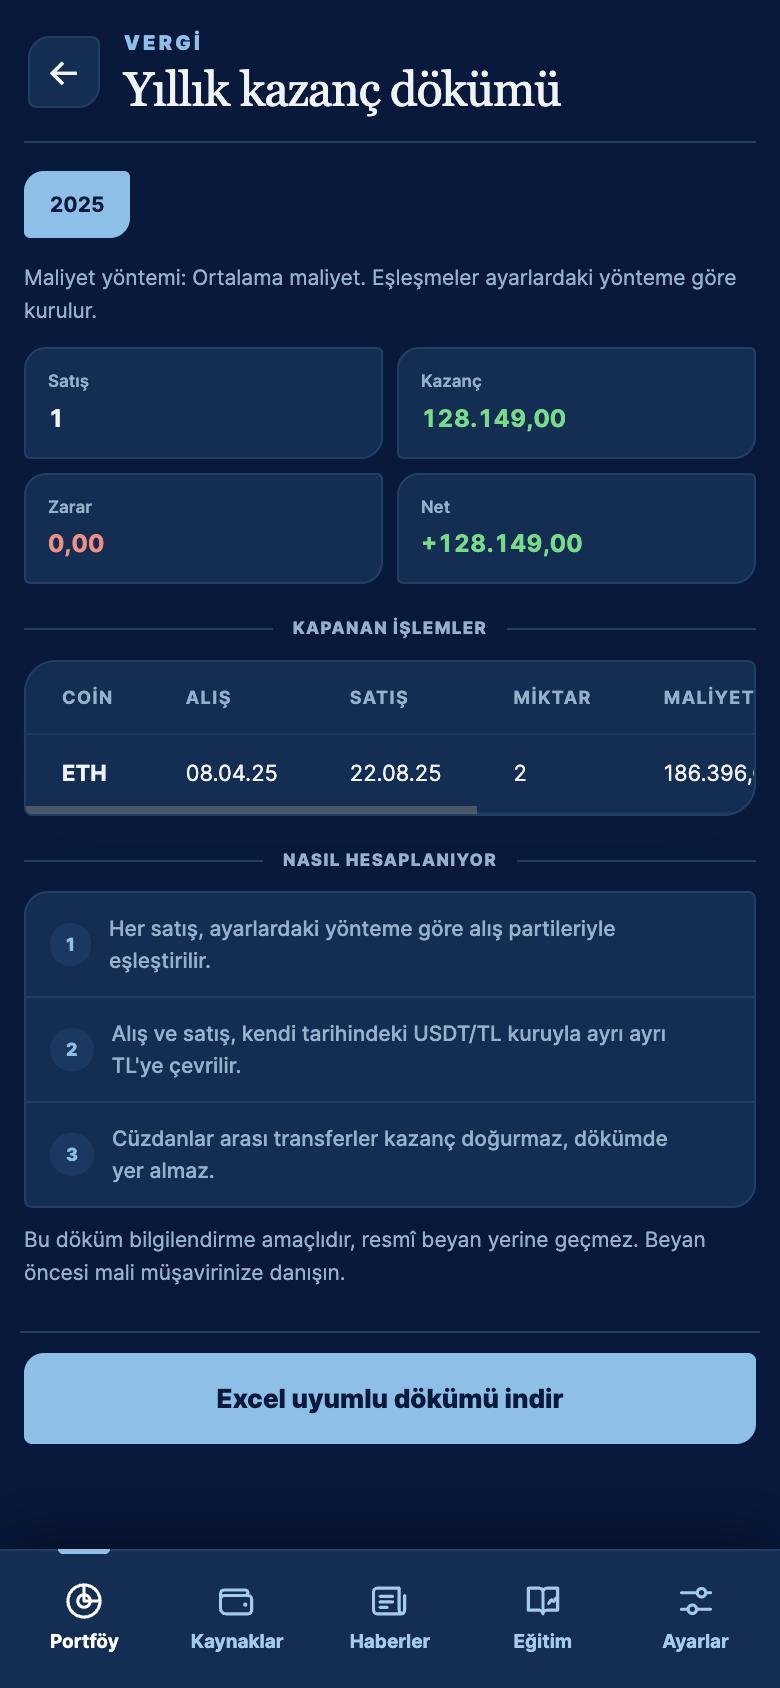
Go to Sources → Write manually, or tap the "Add transaction" shortcut on the Portfolio tab. If the coin isn't listed yet, add it first with "Add coin" on the Portfolio tab.
Fill in the fields
Choose "Buy" or "Sell" at the top. Fill in "Coin", "Amount" and "Your actual price (USDT)"; add "Fee (USDT)", "Date" and "Note" if you like. Enter the price your trade actually filled at on the exchange, not the market price.
Preview the result
The "Trade amount", "With fee" and "New avg. cost" cards update as you type. Below them you see your current position in that coin and its latest trades.
Save
Tap "Save buy" or "Save sell". You can edit or delete saved trades later from the History section.
Trades can't be added in the "All" view; pick a ledger first. If the amount you hold doesn't match your ledger, the "Match amount" button on the same screen adds a single correction record and leaves your past trades untouched.
Getting your tax report
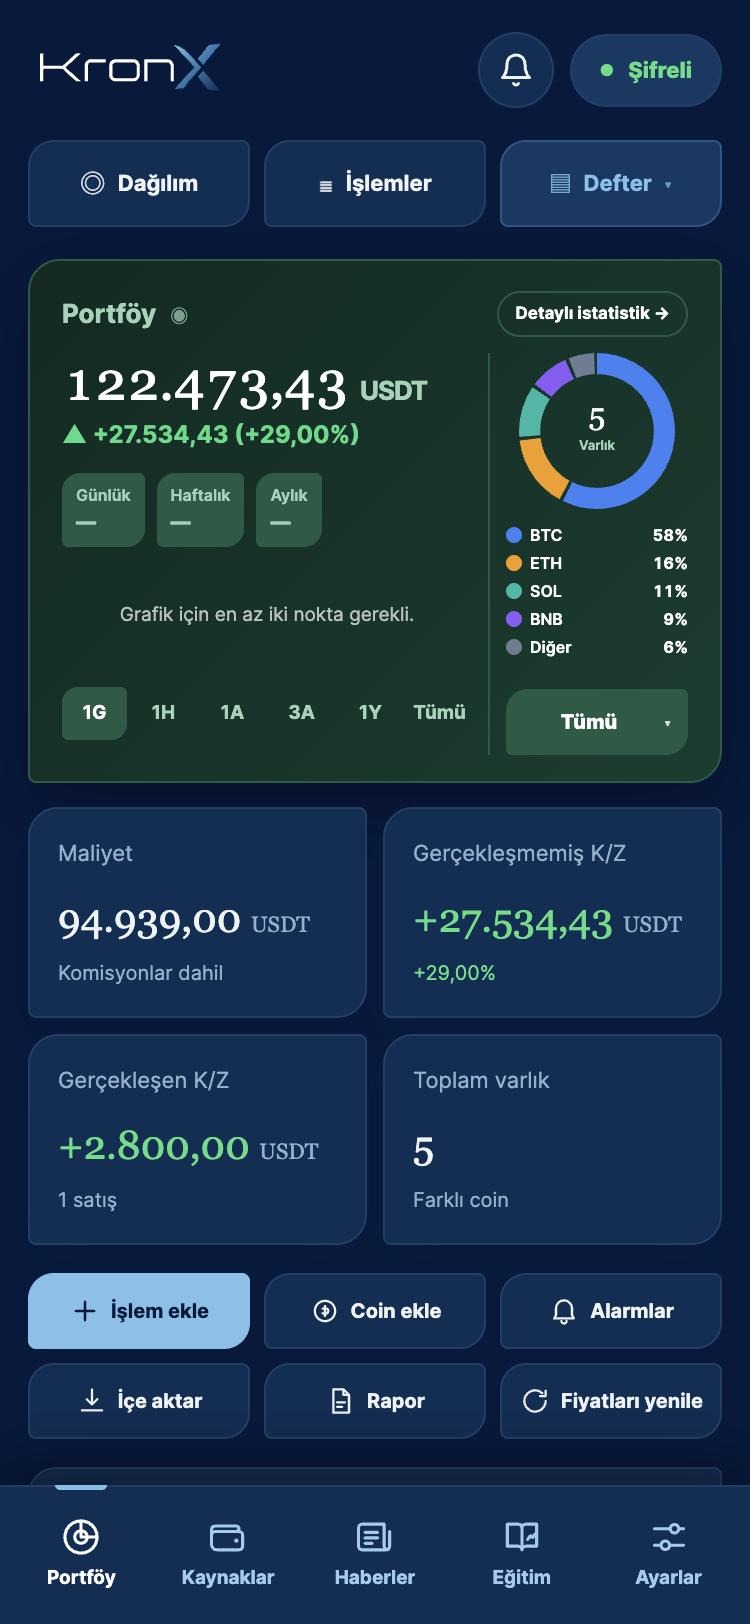
The "Annual gains statement" lists the sales you closed in the selected year, converted to Turkish lira (TRY).
Open the tax report
On the Settings tab, tap "Tax report".
Pick the year
Choose one of the year buttons at the top. The number of sales, gains, losses and net amount appear in summary cards, and closed trades are listed in a table.
Download the statement
Tap "Download Excel-compatible statement". A CSV file is created, and you can save or send it from the share sheet that opens.
- Each sale is matched with buy lots according to the cost method you chose in Settings (average cost, FIFO or LIFO).
- The buy and the sale are each converted to TRY at the USDT/TRY rate of their own date. The statement also shows the holding period in days.
- Transfers between your wallets don't create gains and don't appear in the statement.
- Rows with a missing exchange rate or unknown purchase cost are left out of the totals; the app flags them with a warning.
This statement is for information only and does not replace an official tax filing. We recommend checking it with a tax advisor before you file.
Setting a price alert
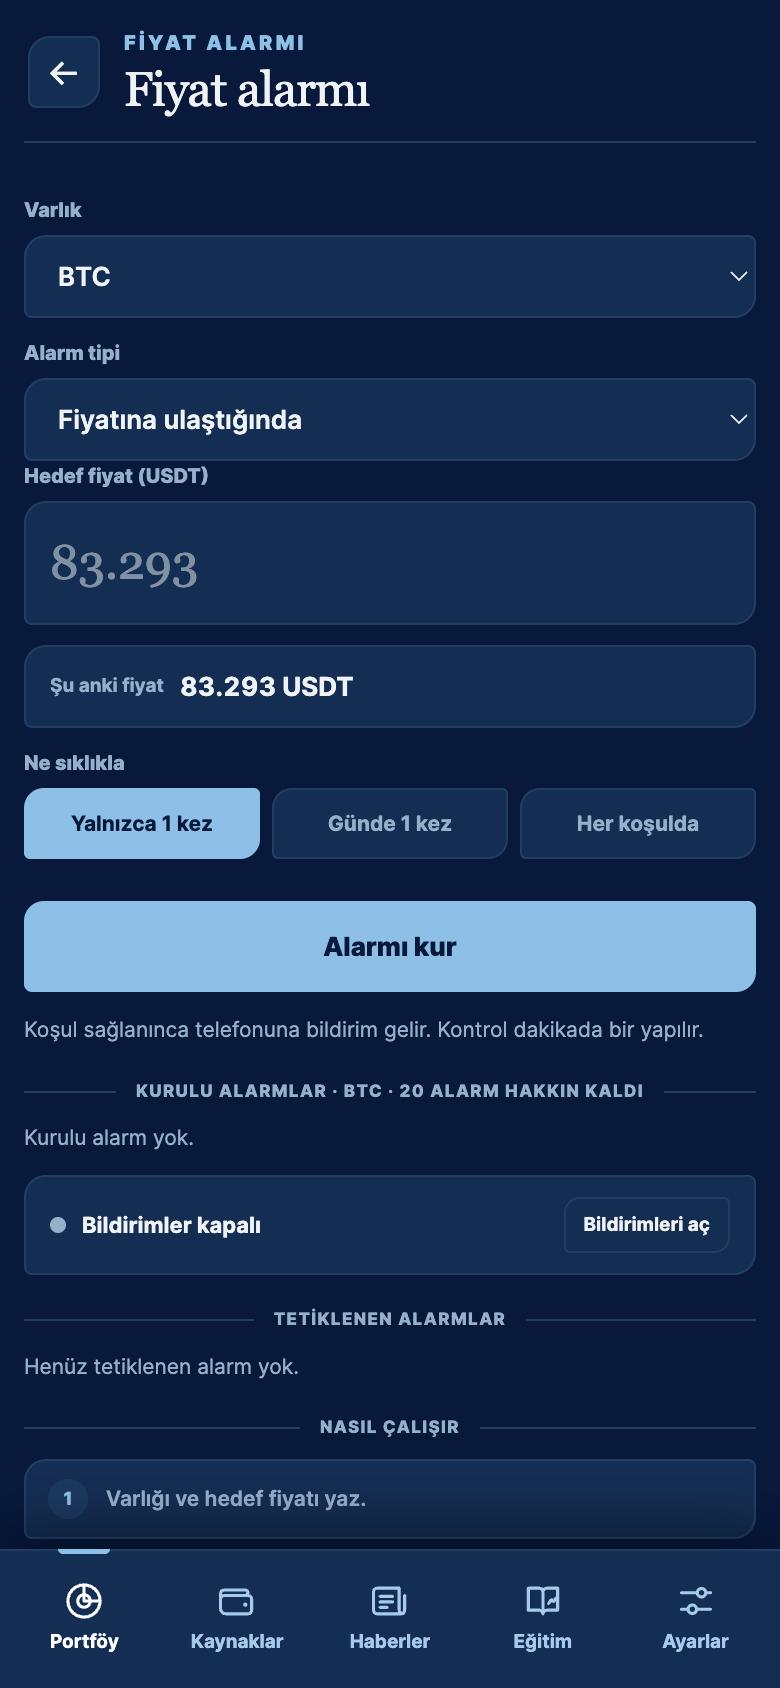
Get a notification on your phone when a coin reaches a target price or moves up or down by a set percentage during the day.
Open Alerts
Tap the "Alerts" shortcut on the Portfolio tab. If you see an "Enable alerts" button, tap it first; alerts are kept on the server so prices can be checked even when your phone is off.
Choose the asset and alert type
Pick the coin from "Asset". For "Alert type", choose "When it reaches the price" or "On daily percent change". For a percentage alert, set "Direction" to "Rises by this much" or "Falls by this much".
Enter the target
Fill in "Target price (USDT)" or "Percent (%)". For a price alert, the current price and the distance to your target are shown; the app works out the direction itself.
Choose how often and set it
Under "How often", choose "Once only", "Once a day" or "Every time", then tap "Set alert".
Allow notifications
If notifications are off, tap "Turn on notifications" and accept your phone's permission prompt. Without permission, an alert can trigger but no notification arrives.
Prices are checked once a minute. The number of alerts you can set is limited, and your remaining allowance is shown on screen. Triggered alerts are deleted automatically after 24 hours.
Syncing your devices
Instead of an account or email, your devices are linked with a 25-character sync code. The app creates this code the first time you open it, and your records are encrypted on your device before they sync.
Find your code on the first device
On the Settings tab, tap "Sync" (if there is no code yet, the button says "Connect devices"). Your code is in the "Your private sync code" field; tap "Copy" to take it.
Enter the code on the second device
Install KronX on the new device and open the same screen. Type the code into "Your current private code" and tap "Connect with this code".
Choose what happens to existing records
If the new device already has records, the app asks what to do. The recommended option is to take the portfolio from the server; the records on that device are then deleted.
Check that it's synced
Once connected, the screen shows "Connected and synced". Changes sync on their own, and you can tap "Sync now" any time.
While a code is connected, an encrypted copy of your ledger is backed up automatically every month, and you can restore past monthly backups from the same screen.
Your sync code is the key to your ledger, so nobody, including us, can access your encrypted ledger on the server. If you lose your code and the records on your device are also deleted, you will need to reconnect your exchanges and wallets and re-enter any transactions you added manually. Keep your code somewhere safe and make regular file backups with Settings → Back up.
Adding the home screen widget
The KronX widget shows your portfolio's total value, daily change and three largest holdings on your home screen.
iPhone and iPad
Enter edit mode
Touch and hold an empty area of your home screen until the icons start to jiggle.
Open the widget gallery
Tap the "+" button at the top left. On some system versions, tap "Edit" first, then "Add Widget".
Choose KronX
Find KronX in the list, pick the small or medium size, and tap "Add Widget".
Android
Open the widget list
Touch and hold an empty area of your home screen and choose "Widgets".
Find KronX
Look for KronX in the list.
Place it
Touch and hold the widget and drag it where you want it on your home screen.
Menu names can vary by phone brand and system version.
The widget gets its data from the app. Open the app at least once and let your portfolio load; until then the widget shows a placeholder message. The figures update whenever the app refreshes prices. Your trade history, costs and sync code are never written to the widget.
Still have a question?
If the FAQ doesn't answer it, write to us from the Contact page or at destek@kronx.co.
Download the app